
Lessons: CG PIPELINE
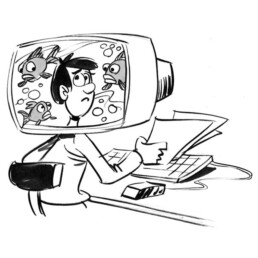
Crafting an Effective Production Pipeline

I originally developed this content as a USC professor, drawing from my teaching experience and consulting work in animation production. While tailored to assist my students in their film projects, the insights shared here can benefit anyone endeavoring to create their own content or intellectual property (IP). While every project requires some specificity, the guidance stems from my extensive experience working with major studios in Los Angeles and engaging with various production pipelines. If you need some help with your pipeline contact me!
Creating your own CG film is a unique journey, requiring a distinct pipeline compared to traditional animation. This is primarily due to the collaborative nature of the process and the need to maintain data integrity. A well-structured project folder and meticulous organization are crucial to success. Here, I present a suggested framework that can serve as a solid starting point for your film project.
Production Pipeline Overview
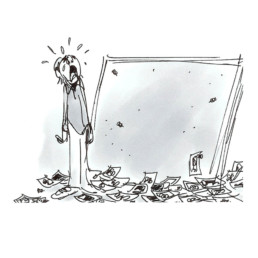
Producing a film is a monumental task. However, breaking it down into manageable chunks can significantly facilitate progress. This is where the production pipeline comes in. It serves as the blueprint, guiding you in assembling these pieces into a cohesive whole.
Key Components:
-
- Feedback Cycle: This phase is primarily concerned with aesthetic cohesion and involves refining the visual elements to ensure they harmonize with the overall artistic vision.
- Production: Here, the focus shifts to executing the tasks required to bring the film to life.
- Resource Distribution: A robust pipeline streamlines the distribution of software and resources to team members, facilitating smooth collaboration and progression toward the final output.
- Asset Management: Production files and data serve as the tangible representation of assets, each with its own dependencies. Balancing organization with flexibility is essential for success; excessive rigidity can stifle creativity, while overly improvised solutions may render assets unmanageable in the long run.
Striking the right balance between structure and adaptability can ensure a seamless production process and deliver a polished final product.
Essential Components of the Production Pipeline
The production pipeline comprises several key components:
- Production Software: This includes the tools for creating content and influencing file formats and capabilities. It may also encompass automation or project-specific software tailored to the project’s practices.
- Standards and Best Practices: Including naming conventions, project file organization, and limitations on factors like poly count and image size. They serve to ensure consistency and efficiency throughout the production process.
- Pipeline Software: Referring to any software or scripts designed to automate aspects of the pipeline, operate at a higher level of abstraction within the project, or enforce adherence to best practices. For instance, approved asset managers may be employed to regulate the linking of assets in a predictable manner rather than relying on manual append/link methods.
Optimizing Asset and Task Management
Asset and Task Management
Resource management (people, computers, assets, and render farms) is critical to project planning.
“Assets” and “Tasks” are good ways to organize your project. The assets are the parts of the show, which are animation, objects, props, effects, and characters built on the computer. Additional assets include the shots for your film.
Assets can be shared: A shot asset may need several models to be built. Each shot asset may be reused for other shots, such as the same chair and room environment used in several shots within a scene and sequence.
Tasks have dependencies: Animation can only begin with the rig being built. A chair can only be created with the reference art. Shading and textures can start with modeling. Tasks for one asset are dependent on the functions of another.
So, an Asset|Task tracking list can combine an asset database and a dependency graph. The graph can be task-based or include asset-to-asset dependencies.
I prefer to start with lists and then create Gantt charts with scheduling and dependencies worked when the assets have to be made with due dates since the whole house of cards can come tumbling down if the tasks are not scheduled.
When creating a shot the tasks must be completed to generate assets used in a scene.
For example, if a character is going to sit in a chair in a scene, you need:
- the chair,
- the room,
- the lights,
- the camera,
- and the character at the minimum to complete the shot.
Each task potentially needs review by the director and technical director to ensure it satisfies both the creative and technical aspects of the asset.


Assets are nouns. Tasks are verbs.
ASSETS:
- animation
- objects
- props
- visual effects
- characters
- cameras
- environments
- shots
TASKS:
- art direction
- concept art
- character design
- layout
- modeling
- texturing
- animation
- lighting
- rendering
- compositing
TASK MANAGEMENT:
- budget
- schedule
- shot list
- asset list

Key Requirements for an Artist-Friendly Production Pipeline
From an artist’s standpoint, the production pipeline must address the following requirements:
- Access to Initial Data/Files: Artists require effortless access to necessary data/files to commence their work, facilitated by a well-organized file structure. For instance, an animator may need access to a shot with a layout, while a texture artist may require models and access to a photo texture library.
- Functional Software: Artists rely on software that enables them to effectively work on the files provided. Whether it’s animation software, modeling tools, or image editing programs, seamless functionality is essential for productivity.
- User-Friendly Pipeline: The pipeline should be designed to be intuitive and straightforward, minimizing confusion and errors. This includes maintaining consistent naming conventions, clear guidelines on file organization, and ensuring smooth file linking processes.
- Integration into the Project: Once completed, artists must be able to seamlessly integrate their work back into the project. This requires compatibility with the overall project structure and an efficient process for incorporating individual contributions into the more significant production.

Optimizing Maya Project Workspace and Rig Referencing
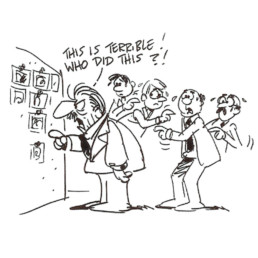
Feedback plays a crucial role in the production pipeline, ensuring that tasks are aligned with the project’s vision and quality standards:
- Input Generation: Project directors and concept crews provide verbal or written descriptions, concept art, storyboards, and animation references to guide the tasks.
- Task Initiation: Artists utilize this material to initiate their work, ensuring alignment with project requirements and creative direction.
- Regular Feedback Sessions: Frequent feedback sessions, held daily or weekly, provide opportunities for artists to receive input and guidance. These sessions may involve comments, draw-overs, or grease pencil annotations on animations.
- Feedback Mechanism: Artists require a platform to share their work and receive feedback effectively. This platform should facilitate constructive input in various forms, supporting iterative refinement of tasks.
- Task Finalization: Tasks are refined iteratively until they meet the agreed-upon standard of completion, as determined by the artist and supervisor or director.
Flexibility: Adjustments may occasionally be necessary even after a task has been finalized. Therefore, the feedback system must be flexible enough to accommodate revisions and modifications.
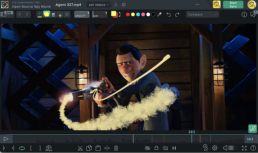
The BEST Tool For Feedback in Production
BAR NONE – SYNC SKETCH is the tool I recommend to give creative feedback in film.
Nothing compares to being able to draw on top of the work to describe your art direction to a team. I have used all of the options out there – frame.io, ftrack review, etc. None of these match what Sync sketch offers. The most important part of syncs ketch is the interactivity no matter how many people are sharing the sync and the ability to draw ANYTHING~! You could even animate right in front of your team with the drawings.
Additional features that Sync Sketch has that impress me and make me want this tool for my everyday interactions with an animation team are:

File Structures
01 PREPROD
All of your pre-production files are housed here for easy reference
01 RESEARCH
- Inspiration
- Logos N Fonts
- Movies
- References
02 TWO SHEET
All of your two-sheet files are housed here for easy reference
- Final
- Old
03 STYLE SHEETS
All of your research on look dev and style sheet files are housed here for easy reference
- Final
- Old
04 CONCEPT ART
All of your pre-production files are housed here for easy reference
- Final
- Old
05 BOARDS
All of your storyboard working files are housed here for easy reference
- Final
- Old
- Scans
- Scripts
06 ANIM TESTS
All of your animation test work files are housed here for easy reference
- Final
- Old
07 ANIMATIC
All of your animatic working files are housed here for easy reference
- Final
- Old
08 PITCH BIBLE
All of your pitch bible work files are housed here for easy reference
- Final
- Old
All of your camera and set files are housed here for easy referencing into Maya. These are your final-hero files.
01 RESEARCH
- 01 Cameras
- SC010
- SC020
- SC030
- 02 Environments
- SC010
- SC020
- SC030
03 SHARED
All of your shared assets are housed here for easy referencing into Maya. These are your final-hero files.
01 RESEARCH
- 01 Cameras
- SC010
- SC020
- SC030
- 02 Chars
- 03 Live Action
- 01 locations
- 02 casting
- 03 wardrobe
- 04 schedules
- 05 production photos
- 06 plates
- 04 Models
- vehicles
- weapons
- 05 Props
- 06 Rigs
04 SHOTS
All of your shots and your Maya project are housed here. This is where you set your project for the Maya workspace.
- assets
- autosave
- clips
- data
- images
- particles
- renderData
- renderscenes
- scenes
- SQ010
- SC0010
- SC0020
- SC0030
- SQ020
- SQ030
- SQ010
- sound
- sourceimages
- textures
05 LIGHT
If you hire a lighter, this is his/her workspace. You may also like to have a separate workspace for lighting even if you are doing it yourself. Just keeps files clean and only the hero work is referenced into the final shots. It is helpful to create a Maya workspace here so all of the files are saved in the right directories. Lights are, of course, shared assets but they get their own place in case you hire a lighter.
- assets
- autosave
- clips
- data
- images
- particles
- renderData
- renderscenes
- scenes
- SQ010
- SC0010
- SC0020
- SC0030
- SQ020
- SQ030
- SQ010
- sound
- sourceimages
- textures
06 AUDIO
If you hire a sound person or even if you just want to keep all of your dialog files in a separate place as you might be making revisions to them, this is where they go. Lights are, of course, shared assets but they get their own place in case you hire a sound designer. Audio is not subject to the Maya project since the audio will be revised and mastered in different software. It is helpful to keep the SEQUENCE/SCENE/SHOT structure, though.
- scratch
- SQ010
- SC0010
- SC0020
- SC0030
- SQ020
- SQ030
07 COMP
If you hire a compositor, this would be their home to work. Final composites bring your CG to a higher level. You may be the one working in this directory. All the same, it’s better to break this part of production out of the rest and let it have it;s own home. Again, it is best to respect the SEQUENCE/SCENE/SHOT structure.
- SQ010
- SC0010
- SC0020
- SC0030
- SQ020
- SQ030
08 EDIT
If you hire an editor, this is where he/she will save their files. This area can get quite messy with lots of iterations, so I encourage you to set up this structure. Keeping and inbox and outbox of the files being exchanged is critical.
- 01 inbox
- progress
- final
- SC0030
- 02 outbox
- final
- progress
- 03 audio
- final
- progress
09 FINAL
Pretty explanatory. This is where all final files to be shared go. This will help you know where the files for submitting to festivals and competitions are for quick reference.
- incoming
- notes
- outgoing
- title credits


Optimizing Maya Project Workspace and Rig Referencing
Maya Project Workspace
Set Project to the Maya workspace:
When working in Maya, it’s best to use the Maya project workspace as it is hardcoded into the file structure and workspace Maya saves the assets in.
Maya is like that drawer you keep your silverware in…
- Maya doesn’t like the spoon in the fork slot.
- Paths are created to point where files are.
- Truncating paths to work with set/project.
- Finding textures.
How to set a project:
Go to File —> Set Project
- Choose the Maya project file structure you copied from the default directory provided with the Maya software.
- Or you can just set the project to any directory and Maya will create the default workspace.
Referencing the rig into your scene files:
You should get into the habit of always referencing the rig/puppet into your scenes. Referencing is beneficial for many reasons.
Why should I reference my characters?
- Your files will be smaller.
- You cannot break the rig.
- Updates are seamless.
- This is how production works, get used to using references.
- Referencing saves time.
How does referencing save time?
- Animation can be created even if rig is not finished.
- Other artists can work on a scene while you animate.
- Updates are done with a simple click instead of copying curves.
- Since the rig file is not actually in the animation file, the size of the scene file is very small.
How to reference a rig:
- Go to File –> Create Reference —> Options
- Reference the rig with the namespacing ON by clicking the Options menu on the right. You want to click on the namespace to activate it.
- Below the box that appears, click on New Namespace String.
- Enter the new namespacing for the rig with a word 4 letters or less (i.e. ball). Hit Reference.
- Next, if you set the project correctly, the file structure should be visible. Select the rig you want to reference into your scene from assets or another directory if it is stored somewhere else.
- Now, you have a rig correctly referenced into your scene file.
- The namespacing is critical to the organization of your files and animation in the scene.
So what have we done and why?
- We resolved all conflicting nodes with a proxy namespacing for the referenced file.
- Character Identification and consistency are why we do this.
- Naming your character makes elements understandable, the larger your file gets.
- Ogre, Girl, Goblin, etc. will allow another user to understand what’s what.
- Multiple references to the same rig require this organization.
- If you have a crowd scene or a group of soldiers, using the same name breaks.
- File names can get long, so the added organization helps you keep track of chars.
- By naming each reference with a different namespacing, you prevent losing the animation.
To see if you did it correctly:
Go to File –> Reference Editor and you should see the file listed in the editor.
Click on the file, and the path should display.
You can see the namespacing listed there.
If you named it incorrectly, this is where you can change it.
You can also repoint your rig here if you end up moving its location for some reason.